Granola is more than just a breakfast staple—it’s a crunchy, satisfying snack that blends wholesome ingredients into one delightful bite. This article dives into crafting the perfect vanilla nut granola recipe from scratch. Whether you’re a granola connoisseur or a first-timer in the kitchen, this guide will walk you through every step, ensuring a crunchy, nutty, and flavorful outcome.
We’ll cover everything from selecting the best ingredients to customizing the recipe for dietary needs. By the end, you’ll know how to make granola that rivals store-bought versions, with the added benefit of fresh, natural ingredients. Let’s begin with the introduction to this delectable recipe.
Table of Contents
Introduction to Vanilla Nut Granola
Homemade granola has been gaining popularity for all the right reasons. Not only does it pack a punch in terms of flavor and texture, but it also allows you to control the ingredients and skip the preservatives found in store-bought options.
Why Homemade Granola is Healthier and Tastier
Ever glanced at the ingredient list on a bag of granola and felt overwhelmed? Many commercial granolas are loaded with hidden sugars, oils, and artificial flavorings. Crafting your homemade vanilla nut granola lets you use simple, nourishing ingredients that deliver unbeatable taste and texture. Plus, you can tweak the sweetness, nuts, and add-ins to your liking.
Homemade granola also eliminates excess oils, giving you full control over what goes into your body. The result? A snack that’s as nutritious as it is delicious.
Benefits of Vanilla and Nuts in Granola
Vanilla isn’t just for baking cakes! When combined with roasted nuts, it creates a flavor combination that’s both comforting and irresistible. The warm, sweet notes of pure vanilla extract enhance the nutty undertones of almonds, pecans, or cashews, offering a balanced bite in every spoonful.
Nuts, meanwhile, bring more than just crunch. They’re packed with healthy fats, protein, and antioxidants, making your granola a powerhouse snack. Almonds, for instance, add a delightful crunch, while pecans provide a rich, buttery flavor.
What Makes This Vanilla Nut Granola Recipe Unique
What sets this vanilla nut granola recipe apart is the simplicity and versatility. With just a handful of natural ingredients, you can create a batch that stays fresh for weeks. It’s easy to mix and match different nuts and add-ins, ensuring no two batches taste exactly the same.
Moreover, this recipe is gluten-free and can be customized to fit vegan diets by swapping out honey for maple syrup. Whether you’re layering it over yogurt, tossing it into smoothies, or eating it by the handful, this granola promises to elevate your snacking game.
Key Ingredients for Vanilla Nut Granola Recipe
Crafting the perfect vanilla nut granola recipe starts with selecting the right ingredients. A combination of nuts, oats, sweeteners, and a touch of vanilla creates that signature crunch and flavor. The beauty of this recipe lies in its simplicity, but the ability to customize it to your taste makes it even better.
Essential Ingredients Breakdown for Vanilla Nut Granola
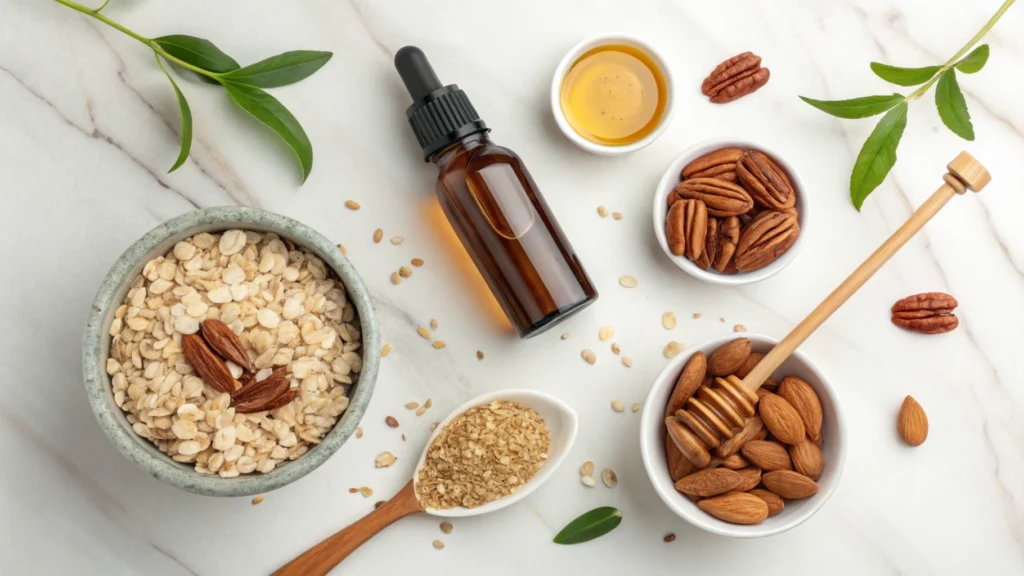
At the heart of any granola recipe is the oat base. Rolled oats work best because they toast evenly and provide that chewy texture everyone loves. However, avoid quick oats—they tend to break down too much during baking.
Nuts are another cornerstone, offering crunch and essential nutrients. Almonds, pecans, and walnuts add layers of richness, each bringing unique flavors to the mix. Additionally, don’t forget seeds like sunflower or pumpkin if you want an extra health boost.
To bring sweetness and bind the ingredients, honey or maple syrup is essential. These natural sweeteners caramelize during baking, creating the delightful clusters we crave. Moreover, a pinch of sea salt enhances every flavor, striking the perfect balance between sweet and savory.
Lastly, vanilla extract takes center stage. It infuses the granola with warm, aromatic notes that tie everything together. This ingredient is key to achieving that distinct vanilla nut granola recipe flavor, which ultimately sets this recipe apart from the rest.
Choosing the Best Nuts for Vanilla Nut Granola
When it comes to nuts, variety is key. Almonds are a classic choice—they’re sturdy and roast well, providing a crunch that holds up even when mixed with yogurt. Pecans, on the other hand, bring a buttery, almost caramel-like flavor that complements the vanilla beautifully.
If you’re feeling adventurous, add cashews or hazelnuts for a sweeter, creamier bite. Mixing different nuts not only diversifies the flavor profile but also enhances the nutritional value of the granola.
Why Vanilla Extract Enhances This Nutty Granola Recipe
Vanilla extract might seem like a small addition, but its impact is significant. It imparts a sweet, floral aroma that mingles perfectly with the nuttiness. Without it, granola can taste flat, missing the depth that vanilla brings.
For the best results, opt for pure vanilla extract over imitation. Pure extract has richer, more authentic flavors that shine through during baking. You’ll notice how even a teaspoon of vanilla transforms the entire batch, making it impossible to resist.
Step-by-Step Vanilla Nut Granola Recipe
Now that we’ve gathered the essentials, it’s time to get baking. Making this vanilla nut granola recipe is straightforward and requires minimal prep. The key lies in carefully layering the ingredients to achieve the perfect texture and flavor balance.
Preparation: Setting Up Your Kitchen
Before diving in, preheat your oven to 325°F (165°C) and line a baking sheet with parchment paper. This simple step prevents sticking and ensures even baking. Grab a large mixing bowl for combining ingredients and a spatula for stirring.
Measure out the oats, nuts, and seeds. Having everything prepped beforehand streamlines the process and minimizes cleanup.
Mixing Ingredients – Achieving the Perfect Consistency
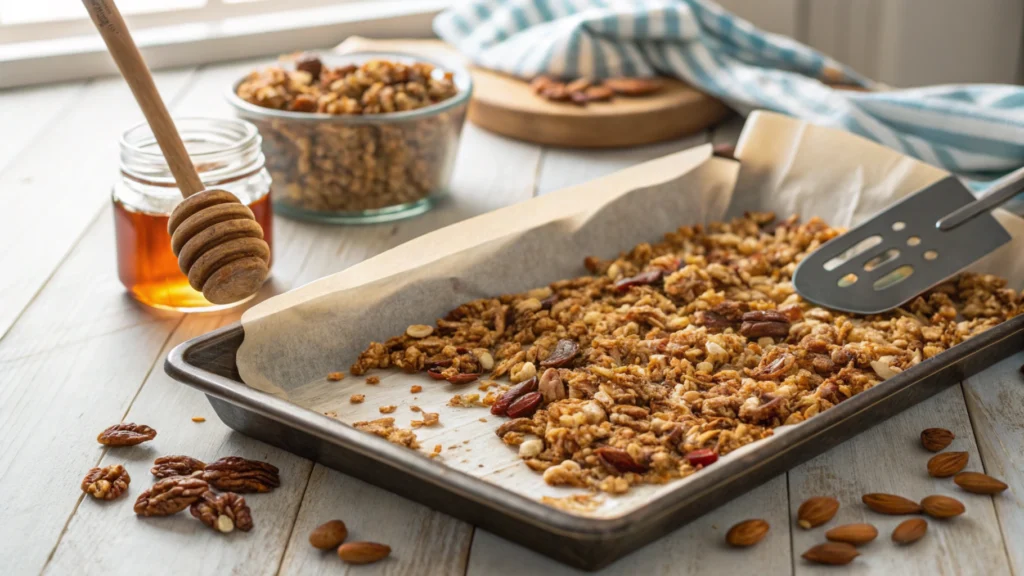
In the large bowl, toss the rolled oats and nuts together. In a separate smaller bowl, whisk the honey (or maple syrup) with the vanilla extract and a pinch of salt. If you like your granola slightly spiced, a dash of cinnamon or nutmeg can add warmth and complexity.
Pour the wet ingredients over the oat-nut mixture, stirring until everything is evenly coated. The goal is to ensure every oat and nut gets a light, sticky glaze. This step is essential for forming those coveted granola clusters.
Baking Tips for Perfect Crunch and Flavor
Spread the granola mixture evenly on the prepared baking sheet, ensuring it forms a thin, uniform layer. Bake for 20–25 minutes, stirring halfway through to prevent burning.
Keep an eye on the edges—granola can turn from golden to burnt quickly. You’re aiming for a light golden brown color. The granola will continue to crisp as it cools, so resist the urge to overbake.
Cooling and Storing the Granola
Once out of the oven, let the granola cool completely on the tray. This step allows it to harden, creating those delicious, crunchy clusters.
Transfer the cooled granola to an airtight container, where it will stay fresh for up to two weeks. Store it in a cool, dry place. For longer shelf life, consider refrigerating or freezing.
And just like that, your homemade vanilla nut granola is ready to enjoy! Whether you sprinkle it over yogurt, blend it into smoothie bowls, or munch on it solo, this batch promises to satisfy every craving.
Customization and Variations
The best part about making your own vanilla nut granola recipe is how easily you can tweak it to suit your preferences. Whether you want to add extra sweetness, introduce dried fruits, or make it vegan, the possibilities are endless.
Adding Dried Fruits or Chocolate
For those with a sweet tooth, tossing in dried cranberries, raisins, or chopped apricots can bring a chewy contrast to the crunchy base. Dark chocolate chips or cocoa nibs add richness without overwhelming the vanilla and nut flavors.
If you decide to add chocolate, wait until the granola has fully cooled. This prevents melting and preserves the clusters’ integrity. As for dried fruits, sprinkle them in during the last 5 minutes of baking to avoid burning but still allowing them to soften slightly.
Vegan and Gluten-Free Options
Switching this vanilla nut granola recipe to suit vegan diets is a breeze. Simply replace honey with maple syrup or agave nectar. The flavor remains rich, and the texture holds up just as well.
For a gluten-free version, ensure you use certified gluten-free oats. Although oats are naturally gluten-free, cross-contamination during processing can be an issue.
Experimenting with Different Nuts and Spices
Nuts are the star here, but don’t be afraid to switch things up. Cashews, pistachios, or even macadamia nuts can create interesting flavor combinations. If you enjoy warm, spiced flavors, try adding a sprinkle of cinnamon, nutmeg, or cardamom.
Granola offers endless possibilities, and each batch can highlight different textures and tastes. Experimenting keeps things exciting and lets you discover new favorite combinations.
For more breakfast inspiration, check out this delicious puff pastry breakfast recipe.
Serving Suggestions for Vanilla Nut Granola
Once you’ve perfected your vanilla nut granola recipe, the next step is figuring out how to enjoy it. Thankfully, granola is incredibly versatile and can be eaten in various ways throughout the day.
Granola with Yogurt and Fruits
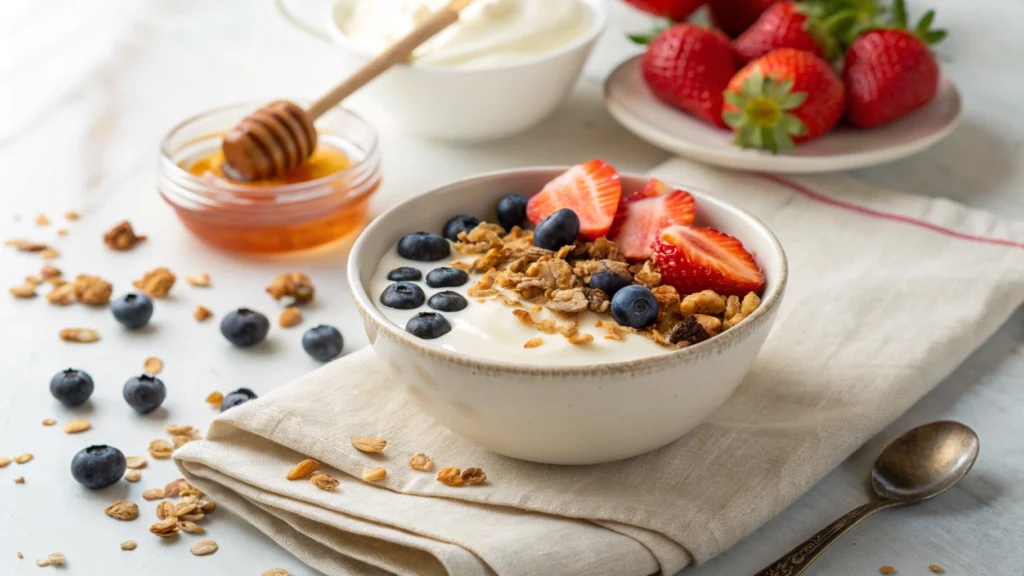
A classic choice, granola layered over Greek yogurt and fresh berries makes for a filling and nutritious breakfast. The creamy yogurt complements the crunchy texture, while the fruit adds natural sweetness. For an extra touch, drizzle some honey or maple syrup on top.
Using Granola in Smoothies and Desserts
Granola isn’t just for breakfast! Sprinkle it over smoothie bowls to add a crunchy element to your blended fruits. You can also use it as a topping for ice cream, puddings, or even baked apples.
Layer granola in parfait glasses with yogurt and fruit to create an eye-catching, delicious dessert that’s perfect for brunch or gatherings.
Snacking On-The-Go
Sometimes, the simplest way to enjoy granola is by the handful. Pack a small jar or baggie to keep in your car, purse, or desk for a quick, healthy snack. It’s a fantastic alternative to processed snack bars and will keep you satisfied between meals.
No matter how you choose to serve it, this vanilla nut granola recipe is bound to become a staple in your kitchen.
FAQs – Answering Common Questions
When making a vanilla nut granola recipe, a few common questions often arise. Whether it’s about storage, ingredient swaps, or achieving the perfect crunch, this section will address the most frequently asked queries to help you master your granola-making skills.
How Long Does Homemade Granola Last?
Homemade granola typically stays fresh for up to two weeks when stored properly. To extend its shelf life, keep it in an airtight container at room temperature. If you prefer a longer-lasting option, granola can be frozen for up to three months. Just be sure to let it cool completely before transferring it to a sealed freezer bag or container.
Moisture is the enemy of crunchy granola, so always store it in a cool, dry place. If your granola starts to lose its crunch, simply toss it in the oven at 300°F for 5–10 minutes to refresh it.
Can I Use Honey Instead of Maple Syrup?
Absolutely! Honey and maple syrup are interchangeable in most granola recipes. Honey tends to provide a slightly thicker and stickier texture, which can lead to larger clusters. Maple syrup, on the other hand, offers a smoother, more caramelized flavor.
If you’re aiming for a vegan vanilla nut granola recipe, maple syrup is the better option since honey is not considered vegan. Either way, the result will be delicious and naturally sweet.
Why is My Granola Not Crunchy?
If your granola turns out soft, it’s likely due to underbaking or not spreading the mixture thinly enough on the baking sheet. To fix this, ensure you bake the granola at 325°F for at least 20–25 minutes, stirring halfway through to promote even toasting.
Another tip is to let the granola cool completely on the baking tray before transferring it to a container. It may seem soft when it comes out of the oven, but it will crisp up as it cools.
Is Granola Good for Weight Loss?
Granola can be part of a balanced diet, but portion control is key. While nuts and oats provide essential nutrients, they are also calorie-dense. Stick to ¼ to ⅓ cup servings and pair granola with high-protein foods like Greek yogurt or cottage cheese to keep you full longer.
Choosing granola with minimal added sugars and healthy fats is also important. Homemade versions allow you to control the ingredients, making it easier to keep the recipe nutritious.
Nutritional Benefits and Health Impact of Vanilla Nut Granola
Granola isn’t just a tasty breakfast—it’s a nutritional powerhouse. A well-made vanilla nut granola recipe blends oats, nuts, and natural sweeteners to create a snack that’s as wholesome as it is delicious. Whether you’re fueling your morning or grabbing a midday bite, this granola offers a range of health benefits.
Key Nutrients Found in Homemade Granola
One of the greatest perks of homemade granola is its nutrient density. Rolled oats are packed with fiber, which supports digestion and keeps you feeling full longer. This helps curb cravings and prevents unnecessary snacking throughout the day.
Nuts like almonds and pecans contribute healthy fats and protein, essential for muscle repair and energy. They also offer a boost of vitamin E, magnesium, and antioxidants, supporting heart health and reducing inflammation.
Adding seeds, such as sunflower or pumpkin, can further elevate the nutritional profile, providing omega-3 fatty acids and essential minerals. When combined, these ingredients create a snack that nourishes the body and keeps energy levels stable.
Health Benefits of Nuts and Vanilla
Nuts aren’t just crunchy—they’re incredibly heart-healthy. Studies show that eating nuts regularly can lower bad cholesterol and improve overall cardiovascular function. Plus, the healthy fats found in nuts aid in nutrient absorption and keep you satisfied longer.
Vanilla, often overlooked as just a flavor enhancer, actually contains antioxidants that help reduce oxidative stress. It’s also known for its calming properties, making it a comforting addition to any recipe.
By crafting your own vanilla nut granola recipe, you’re choosing fresh, high-quality ingredients that contribute to long-term health. This recipe proves that nutritious eating doesn’t have to be boring or bland.
Storing and Preserving Your Vanilla Nut Granola
Making a big batch of granola is great, but knowing how to store it ensures it stays fresh and crunchy. Proper storage techniques can keep your vanilla nut granola recipe tasting just as good weeks after baking.
Best Storage Practices for Long-Lasting Granola
To preserve that delightful crunch, always store granola in an airtight container. Glass jars, sealed plastic containers, or resealable bags work perfectly. Keep the container in a cool, dry place, away from direct sunlight or moisture.
For the freshest flavor, consume homemade granola within two weeks. If you don’t plan to eat it all right away, consider freezing portions. Granola freezes exceptionally well and can be stored for up to three months without losing texture or taste.
Refreshing Stale Granola
Sometimes, granola can lose its crispiness over time. Luckily, bringing it back to life is simple. Just spread the granola on a baking sheet and bake at 300°F (150°C) for 5–10 minutes. Allow it to cool completely before storing it again. This quick step restores that signature crunch and makes it taste freshly baked.
With the right care, your homemade vanilla nut granola will stay delicious and ready to enjoy whenever hunger strikes.
Conclusion
Crafting your own vanilla nut granola recipe is simple, rewarding, and endlessly customizable. By following the steps outlined in this guide, you’ll create a flavorful, crunchy granola that can be enjoyed for breakfast, dessert, or as an on-the-go snack.
Now that you know how to make this delicious granola, why not give it a try? We’d love to hear about your experience in the comments below. If you added unique twists or flavors, share your ideas!
For more breakfast ideas, check out our puff pastry breakfast recipes.
If you enjoyed this recipe, don’t forget to rate it, comment, and share it with friends and family. Happy baking!

